How To Use Web Workers in an Angular Application
The Web Workers API is a feature of modern browsers which enables running scripts in a background thread separate from the browser’s main thread, keeping it free to focus on updating your web app’s UI and making your application smooth and responsive.
Web Workers are now supported in all major browsers except Opera Mini, which is mostly used on feature phones with limited processing power.
How to Add a Web Worker in an Angular Component
Adding a web worker in Angular is surprisingly easy – just run one Angular CLI command:
ng g web-worker <location>
With this, it will generate a *.worker.ts file, scaffold the minimal usage in the location you indicate, and configure the app for using web workers.
The location can be any Angular component.
So, for example, if you want to generate a worker for the root App component, just run the following in the terminal.
ng g web-worker app
This will generate an app.worker.ts file beside app.component.ts
Demo Angular App with Web Workers
In this next section let’s create a basic demo angular application that sorts a list of super hero names – just to make it familiar if you have ever followed Angular’s tour of heroes tutorial.
This emoji 👨🏻💻 means you are going to write some code!
First, let’s create a new app web-worker-demo with the defaults (i.e., no routing and using CSS for styling).
ng new web-worker-demo --defaults
This creates your demo app in a directory named web-worker-demo and installs all node module dependencies.
Once done, open the generated directory and run the angular development server.
cd web-worker-demo
ng serve
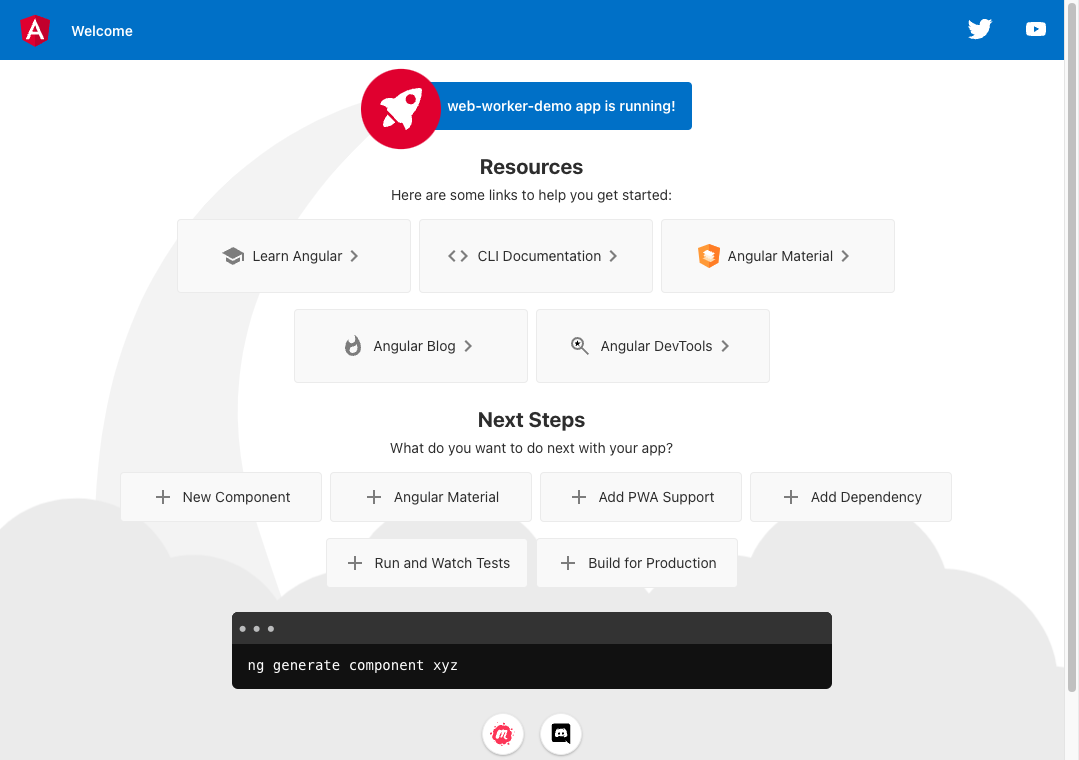
If you open your browser to localhost:4200 (or whatever the dev server shows you), you should find a default initial Angular app running which should look like this:

Great! Now that we have an Angular app, lets display some super hero names.
👨🏻💻 Open the App component class file app.component.ts and replace all of its contents with the following:
// app.component.ts

import { Component } from "@angular/core";

@Component({
  selector: "app-root",
  templateUrl: "./app.component.html",
  styleUrls: ["./app.component.css"],
})
export class AppComponent {
  title = "Awesome Heroes";
  heroes = [
    { id: 12, name: "Dr. Nice" },
    { id: 15, name: "Magneta" },
    { id: 13, name: "Bombasto" },
    { id: 17, name: "Dynama" },
    { id: 16, name: "RubberMan" },
    { id: 14, name: "Celeritas" },
    { id: 19, name: "Magma" },
    { id: 18, name: "Dr. IQ" },
    { id: 20, name: "Tornado" },
  ];
}
👨🏻💻 Then replace everything in the App component template app.component.html with:
<!-- app.component.html -->

<h1>{{ title }}</h1>

<ul class="hero-list">
  <li *ngFor="let hero of heroes">
    <span class="badge">{{ hero.id }}</span>
    <span class="name">{{ hero.name }}</span>
  </li>
</ul>

<button>Sort by ID</button>
<button>Sort by Name</button>
👨🏻💻 Let’s make it look a bit fancy with by putting the following in the App component CSS app.component.css:
h1 {
  color: #369;
  font-family: Arial, Helvetica, sans-serif;
  font-size: 200%;
}

button {
  background-color: #eee;
  border: none;
  border-radius: 4px;
  cursor: pointer;
  color: black;
  font-size: 1.2rem;
  padding: 1rem;
  margin: 1rem 1rem 1rem 0;
}

button:hover {
  background-color: black;
  color: white;
}

ul.hero-list {
  list-style: none;
}

ul.hero-list li {
  border: 1px solid #369;
  border-radius: 5px;
  width: 200px;
  margin-bottom: 15px;
}

span.badge {
  color: white;
  background-color: #369;
  padding: 0 1rem;
  margin-right: 1rem;
}
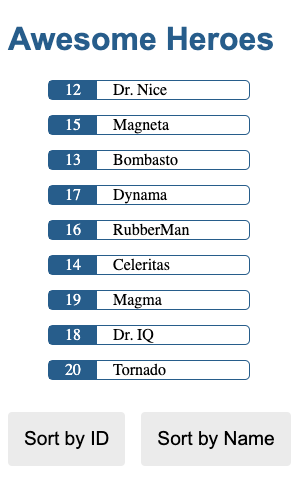
Your app should look like this:

Notice the list is not sorted at all – neither by ID or Name. Let’s fix that.
Now, it’s time to create a web worker.
In your terminal, run the command to add a web worker for the App component:
ng g web-worker app
After running this, a new app.worker.ts file is generated, and your app.component.ts file will be updated with a minimal usage.
Go on, check around what has changed in your app’s code.
Do you see the generated code in the App component file? We are going to use this later.
If your browser is now showing a blank white page, unfortunately, this is because the angular configuration was updated.
Don’t panic. You just have to restart (i.e., stop and start) your development server.
Most operating system terminals allow this by pressing [CTRL]+’C’ and running
ng serveagain.
👨🏻💻 Open app.component.ts, create a sortHeroes method that accepts a flag string as argument in the AppComponent class.
👨🏻💻 Next, move all the generated code for using the web worker in it, and you should have this:
// app.component.ts

  sortHeroes(flag: string) {
    if (typeof Worker !== 'undefined') {
      // Create a new
      const worker = new Worker(new URL('./app.worker', import.meta.url));
      worker.onmessage = ({ data }) => {
        console.log(`page got message: ${data}`);
      };
      worker.postMessage('hello');
    } else {
      // Web Workers are not supported in this environment.
      // You should add a fallback so that your program still executes correctly.
    }
  }
In this minimal usage generated by Angular CLI, we see that it has an if-else condition that checks if a Worker class exists in the environment. This allows us to write a fallback logic inside the else block for when the browser/environment does not support Web Workers.
If the Worker class exists (i.e., its type is not undefined), this will create a new worker instance.
The worker instance can accept a callback for its onmessage property, and allow the creator (i.e., our AppComponent) to send it messages via its postMessage method.
More on the usage of these below.
👨🏻💻 Now in the App template app.component.html let’s update the <button> elements so that they will call our new sortHeroes method every time the user clicks our button and pass the flag.
<!-- app.component.html -->

<button (click)="sortHeroes('id')">Sort by ID</button>
<button (click)="sortHeroes('name')">Sort by Name</button>
Check your devtools console and try clicking the buttons to see what’s happening.

If you see this, your app is now creating and using a web worker.
👨🏻💻 Now update the sortHeroes method so that it will call worker.postMessage with an object containing heroes and the received flag argument.
👨🏻💻 Also, update the worker.onmessage callback so that it will assign the processed data to this.heroes.
Your sortHeroes method should now be:
// app.component.ts

  sortHeroes(flag: string) {
    if (typeof Worker !== 'undefined') {
      // Create a new
      const worker = new Worker(new URL('./app.worker', import.meta.url));
      worker.onmessage = ({ data }) => {
        this.heroes = data;
      };

      worker.postMessage({ heroes: this.heroes, flag });
    } else {
      // Web Workers are not supported in this environment.
      // You should add a fallback so that your program still executes correctly.
    }
  }
This sends a message to our worker, letting it know that we want to sort the heroes list using the flag property.
After the worker instance is done processing, it will then send a message back to its creator and this will trigger the onmessage callback where we assign the processed data back to our heroes list.
👨🏻💻 Now let’s program our worker to do the sorting. Open app.worker.ts and replace its contents with the following:
// app.worker.ts

/// <reference lib="webworker" />

addEventListener("message", ({ data }) => {
  const { heroes, flag } = data;
  const response = heroes.sort((a: any, b: any) => {
    if (a[flag] < b[flag]) return -1;
    if (a[flag] > b[flag]) return 1;
    return 0;
  });
  postMessage(response);
});
What’s happening here? First, a callback is attached to the message event which will be triggered when the message sent by AppComponent is received.
Next, the data object received will contain the heroes array and flag in it, so we destructure the received data and use this information for the heroes.sort callback.
Now check your app again in your browser and click around the two buttons.
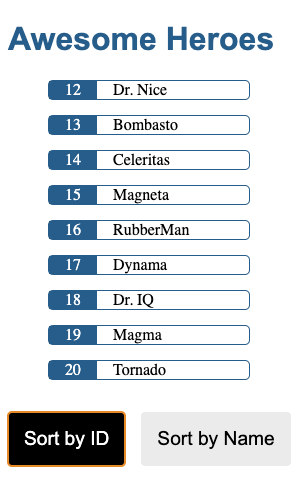
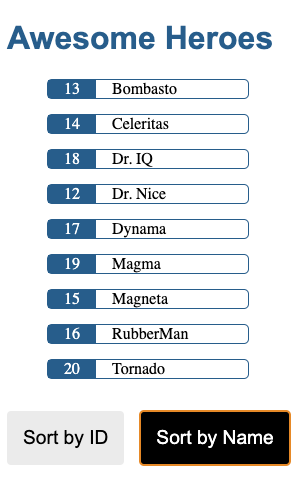
The heroes list should now be sorted depending on which button you click.
| Sorted by ID | Sorted by Name |
|---|---|
 |
 |
Congratulations! You just built an Angular app that sorts a list of heroes by name or ID… using a Web Worker! 🎉
The code for this demo app is in my GitHub repository
Gochas in Using Web Workers in Angular
In our demo app, we only handled the scenario when Web Workers are supported in the browser. You should definitely always handle the other scenario so that it will still work even without web workers.
In our example above, just implement the sorting logic we did from app.workers.ts in the else block inside your sortHeroes method.
I would advice to have a function in a separate file (e.g., sort-heroes.ts) for this so that you can just import the function to be used in both app.component.ts and app.worker.ts
One other gocha that I encountered in my work with Web Workers in Angular, is that Jest (our unit test runner) needed to be configured to support EcmaScript Modules (ESM). The dynamic import import.meta.url will produce an error in your unit test if your runner does not support ESM.
In Summary…
We now know how to use Web Workers in Angular. We have seen how easy it is to use Angular CLI to add a worker for any component in our app. We even built a simple demo application that creates and sends a message to a web worker so that it will sort an array for us.
Thank you for reading!
If you find this helpful or have ideas to improve it, I always appreciate feedback. You can send me an email ayo[at]ayco.io or follow me on Mastodon @ayo@ayco.io